

دیروز نحوه کنترل پینهای آردوینو خود را از طریق اینترنت با استفاده از آردوینو اترنت شیلد که بهعنوان سرور راهاندازی شده است، توضیح دادیم. امروز میخواهیم نگاهی به استفاده از شیلد بهعنوان مشتری برای دریافت اطلاعات از یک صفحه وب بیاندازیم و به آن گزارش دهیم. من از این روش چند ماه پیش استفاده کردم که شمارنده فالوورهای توییتر Nixie را با نام Twixie ساختم .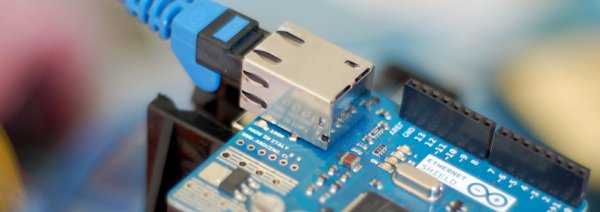
سپر اترنت را می توان برای دسترسی به هر سایتی که با رمز عبور محافظت نشده است به راحتی مورد استفاده قرار داد، اما بازگرداندن اطلاعات به شما بخش سختی است. برای Twixie یک صفحه php ویژه ایجاد کردم که از API توییتر پرس و جو می کرد و فقط تعداد توییتر را نشان می داد. این باعث شد که من مجبور نباشم به آردوینو بگویم به دنبال چه چیزی بگردم، یا خطوط بی پایان HTML را به دنبال یک عدد جستجو کنم. برای مثال ما ساده تر می شوم. من یک فایل PHP ایجاد کردم که فقط یک رشته الفبای عددی تصادفی را خروجی می دهد. من این کار را انجام دادم زیرا راه اندازی همه افراد با یک حساب API در جایی فراتر از محدوده این مقاله است و برای اثبات مفهوم و شروع به کار نیازی نیست. اما، ایده این است که شما به راحتی می توانید آن فایل PHP (هر فایل قابل دسترسی تحت وب) را بردارید و آن را تغییر دهید تا هر آنچه را که نیاز دارید نمایش دهد.
در حالت کلاینت، سپر اترنت قادر است به یک صفحه وب دسترسی داشته باشد و آنچه خوانده شده را برگرداند. اما خواندن یک بایت در یک زمان انجام می شود و کل مطلب را می خواند. بنابراین می تواند مانند یک سوزن در انبار کاه در صفحات بزرگ باشد. حتی اگر صفحه ای که می خوانیم فقط حاوی اطلاعات مورد نیاز ما باشد، در ابتدا اطلاعات اضافی وجود دارد که برای آردوینو ارسال می شود. شما هرگز آن را نمی بینید، اما یک وب سرور در واقع اطلاعات اضافی را به عنوان "هدر" ارسال می کند که به مرورگر اطلاعات مختلفی در مورد آن صفحه می گوید (این با برچسب HTML متفاوت است).
به همین دلیل، ما به راهی نیاز داریم تا به آردوینو بگوییم چه چیزهای ناخواسته و چه چیزهای خوب هستند. برای انجام این کار می خواهیم اطلاعات را در < > احاطه کنیم. هنگامی که آردوینو شروع به خواندن صفحه می کند، به آن می گوییم که همه چیز را نادیده بگیرد تا زمانی که "<" را ببیند. از این مرحله به بعد، به آردوینو میگوییم که هر کاراکتر زیر را ضبط کند تا زمانی که کاراکتر پایانی ما ">" را ببیند. در این مرحله آردوینو همه چیز مورد نیاز خود را دارد و از سرور جدا می شود و سپس با داده هایی که پیدا کرده گزارش می دهد.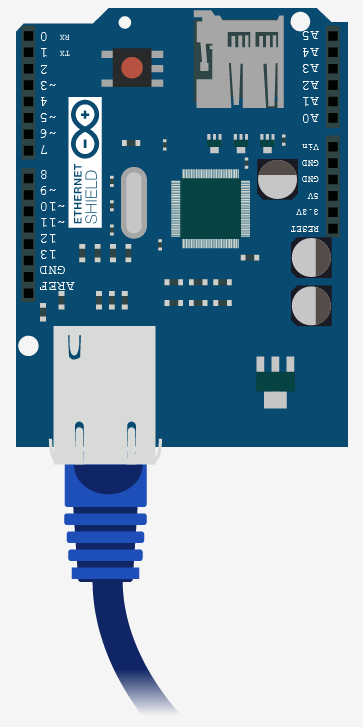
کتابخانه Ethernet Shield همراه با پشتیبانی از DNS خارج از جعبه ارائه نمی شود، به این معنی که ما نمی توانیم به سادگی به وب سایت مورد نیاز خود از طریق URL ساده آن (مانند http://arduino.cc) دسترسی پیدا کنیم. نه، متأسفانه، ما باید از طریق یک آدرس IP به سایت دسترسی داشته باشیم. به عنوان مثال، آدرس IP bildr 174.123.231.247 است و شما در واقع می توانید به bildr دسترسی پیدا کنید http://174.123.231.247/~bildr/ – هر وب سروری به شما اجازه انجام این کار را نمی دهد، اما زمانی که می توانید معمولاً IPADDRESS/ است. ~ACCOUNT_USERNAME - بنابراین می توانید فایل PHP را که برای شما ایجاد کردم در اینجا مشاهده کنید http://174.123.231.247/~bildr/examples/ethernet/
برای جزئیات بیشتر: دریافت داده از وب – آردوینو + اترنت
در ادامه، متن انگلیسی این مطلب را میتوانید مشاهده نمایید:
Yesterday we covered how you would go about controlling pins of your arduino over the internet using the Arduino Ethernet Shield set up as a server. Today we are going to take a look at using the shield as a client to get information off of a web page, and report back. I used this method a few months ago when I made the Nixie Twitter follower counter dubbed Twixie.
The ethernet shield can be used to access any non-password protected site with ease, but getting the information back to you is the hard part. For Twixie I created a special php page that queried the twitter API and displayed only the twitter count. This made it so I didn’t have to tell the arduino what to look for, or scour endless lines of HTML looking for a single number. For our example im going simplier. I created a PHP file that just outputs a random alphanumeric string. I did this because getting everyone setup with an API account somewhere is beyond the scope of this article, and unneeded to prove the concept and get you started. But, the idea is that you could easily take that PHP file (any web accessible file) and taylor it to display whatever you need.
In the client mode, the ethernet shield is able to access a webpage and return what is read. But the reading is done one byte at a time, and it reads the entire thing. So it can be like a needle in a haystack on large pages. Even if the page we are reading contains only the information we need, there is extra information at the beginning that is sent to the arduino. You never see it, but a web server actually sends extra information know as a “header” that tells the browser various information about that page (this is different than HTML’s tag).
Because of this, we need a way to tell the arduino what is junk, and what is the good stuff. To do this we are going to surround the information in < >. When the Arduino starts to read the page we tell it to ignore everything until it sees “<“. From this point on we tell the arduino to record each following character until it sees our ending character “>“. At this point the arduino has everything it needs, and disconnects from the server then reports back with the data it found.
The Ethernet Shield library does not come with DNS support out of the box meaning we can not simply access the website we need by its simple URL (like http://arduino.cc). No, sadly, we need to have access the site through an IP address. For instance, bildr’s IP address is 174.123.231.247 and you can actually access bildr like so http://174.123.231.247/~bildr/ – Not every web-server allows you to do this, but when you can it is typically IPADDRESS/~ACCOUNT_USERNAME – So you can see the PHP file I created for you here http://174.123.231.247/~bildr/examples/ethernet/
For more detail: Getting Data From The Web – Arduino + Ethernet
