

هنگام اتصال بردهای آردوینو گزینه های ارتباط بی سیم زیادی وجود دارد . یکی از محبوب ترین آنها وای فای است. در فواصل کوچک و در اطراف نقاط اتصال Wi-Fi به خوبی کار می کند، اما زمانی که ماژول ها نیاز به اتصال در فواصل طولانی در مناطقی که اینترنت وجود ندارد، Wi-Fi یک گزینه نیست. خوشبختانه یک جایگزین عالی و به راحتی در دسترس وجود دارد - ماژول های LoRa ( شبکه وسیع برد بلند ) امکان ارسال بسته های کوچک داده را بین ماژول ها در فواصل بسیار طولانی ( 5 کیلومتر یا بیشتر ) می دهد.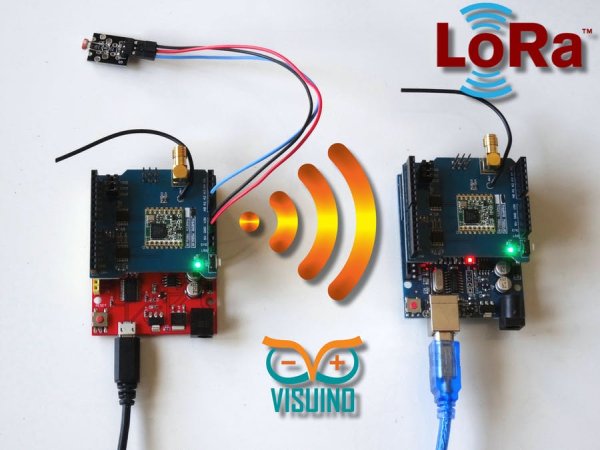
Visuino از تعدادی ماژول LoRa پشتیبانی می کند ، و من مدت زیادی در حال برنامه ریزی آموزش بودم، زیرا چند ماژول Adafruit LoRa داشتم . با این حال، اخیراً افراد بزرگ Makerfabs ، 2 RFM95W 868MHz LoRa Shields و حتی یکبرد عالی Maduino UNO سازگار با آردوینو UNO برای من فرستادندماژول های Makerfabs کیفیت فوق العاده خوبی دارند و من تصمیم گرفتم این آموزش را با آنها تهیه کنم.
در این آموزش به شما نشان میدهم که نصب شیلدهای LoRa بر روی ۲ برد آردوینو UNO چقدر آسان است و آنها را با Visuino برای انتقال دادهها در مسافت طولانی برنامهریزی میکنید.
مرحله 1: اجزاء
- دو برد سازگار با آردوینو UNO (من از یک کلون عمومی Arduino UNO و یک مادوینو UNO از Makerfabs استفاده میکنم ، اما هر دیگری خوب خواهد بود)
- دو محافظ رادیویی Makerfabs LoRa ( RFM98W 433MHz ، یا RFM95W 868MHz ) مطمئن شوید که هر دو سپر از یک نوع هستند، در غیر این صورت قادر به برقراری ارتباط نخواهند بود.
- یک ماژول حسگر مقاومت نوری از این مجموعه ارزان قیمت 37 حسگر دریافت کردم
- 3 سیم بلوز زن - نر
مرحله 2: Makerfabs LoRa Shield و ماژول سنسور نور را به آردوینو وصل کنید
ابتدا پروژه ارسال آردوینو را مونتاژ می کنیم :
- همانطور که در تصاویر 1، 2، 3 و 4 و در ویدیو نشان داده شده است، LoRa Shield را در بالای Arduino Uno وصل کنید .
- انتهای ماده زمین ( سیم سیاه )، برق ( سیم قرمز ) ، و سیگنال ( سیم آبی ) را به ماژول مقاومت نوری ( تصویر 5 ) وصل کنید .
- سر دیگر سیم زمین ( سیم سیاه ) را به پایه زمین برد آردوینو وصل کنید ( تصویر 6 )
- سر دیگر سیم برق ( سیم قرمز ) را به پایه برق 5 ولت برد آردوینو وصل کنید ( تصویر 6 )
- سر دیگر سیم سیگنال ( سیم آبی ) را به پایه آنالوگ 0 برد آردوینو وصل کنید ( تصویر 6 )
مرحله 3: Visuino را راه اندازی کنید و LoRa Shield را به کامپوننت آردوینو اضافه کنید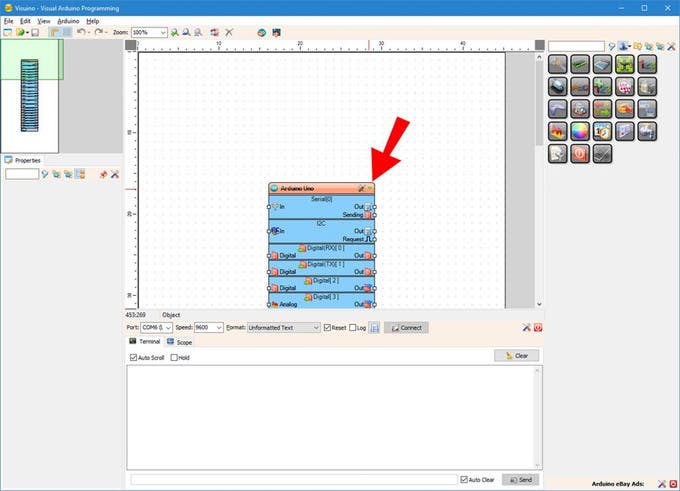
برای شروع برنامه نویسی آردوینو، باید Arduino IDE را از اینجا نصب کنید: http://www.arduino.cc/ .
برای جزئیات بیشتر: سنسور نور از راه دور با RFM95W/RFM98W LoRa
در ادامه، متن انگلیسی این مطلب را میتوانید مشاهده نمایید:
There are many wireless communication options when connecting Arduino boards. One of the most popular ones is the Wi-Fi. It works well at small distances, and around Wi-Fi hotspots, however when the modules need to connect over long distance at areas where Internet is not present, Wi-Fi is not an option. Luckily there is a great and easily available alternative – the LoRa (Long Range Wide-area network) modules allow sending small packets of data between modules over very long distances (5 Km or more) .
Visuino has support for a number of LoRa Modules, and I was planning tutorial for quite some time, since I had some Adafruit LoRa modules. However, recently the great people at Makerfabs, sent me 2 RFM95W 868MHz based LoRa Shields, and even a great Arduino UNO compatible Maduino UNO board. The Makerfabs modules are of exceptionally good quality, and I decided to make this tutorial with them.
In this tutorial I will show you how easy it is to install the LoRa shields on 2 Arduino UNO boards, and program them with Visuino to transmit data over long distance.
Step 1: Components
- Two Arduino UNOcompatible boards (I use one Arduino UNO generic clone, and one Maduino UNO from Makerfabs, but any other will be just fine)
- Two Makerfabs LoRa Radio Shields ( RFM98W 433MHz, or RFM95W 868MHz ) Make sure both shields are the same type, otherwise they will not be able to communicate
- One Photoresistor Sensor module I got from this cheap 37 sensors set
- 3 Female-Male jumper wires
Step 2: Connect the Makerfabs LoRa Shield, and the Light Sensor Module to Arduino
First we will assemble the Sending Arduino project:
- Plug the LoRa Shield on top of the Arduino Uno as shown on the Pictures 1, 2, 3, and 4 and on the Video
- Connect Female ends of the Ground(Black wire), Power(Red wire), and Signal(Blue wire) to the Photoresistor Module (Picture 5)
- Connect the other end of the Ground wire(Black wire) to the Ground pin of the Arduino board (Picture 6)
- Connect the other end of the Power wire(Red wire) to the 5V power pin of the Arduino board (Picture 6)
- Connect the other end of the Signal wire(Blue wire) to the Analog pin 0 of the Arduino board (Picture 6)
Step 3: Start Visuino, and Add LoRa Shield to the Arduino Component
To start programming the Arduino, you will need to have the Arduino IDE installed from here: http://www.arduino.cc/.
For more detail: Long Distance Remote Light Sensor With RFM95W/RFM98W LoRa
