

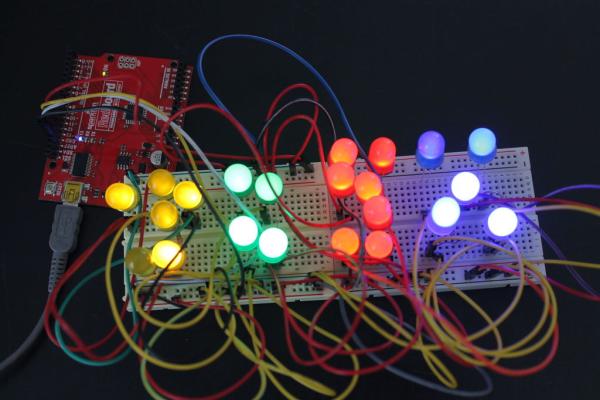
طراحی مینی بیلبورد با استفاده از چراغ های LED (رنگ های مختلف)، آردوینو و تخته نان. به فکر ایجاد یک بیلبورد کوچک بودم که بتواند نام من ("جاش") را نمایش دهد. این برای یکی از شب های ساخت است (ما باید از چراغ های LED استفاده کنیم). این بیلبورد مثل هر بیلبورد بزرگی چندین بار به بیرون چشمک می زند. در اینجا پیوندی به ویدیوی پروژه Mini Billboard وجود دارد . من را در توییتر @SJTGs دنبال کنید
مرحله 1: ابزارهای مورد نیاز برای این پروژه
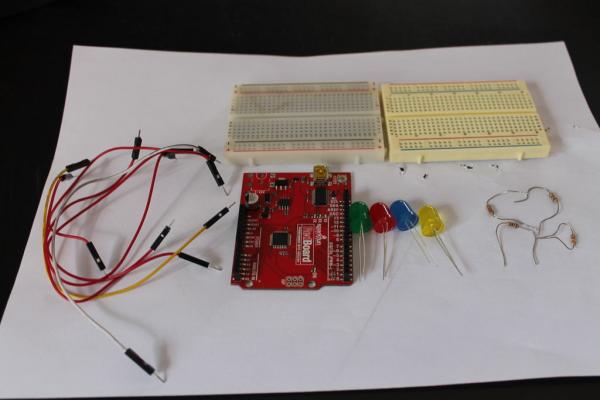
ابزار مورد نیاز برای این پروژه:
- دو تخته نان
- چراغ های LED با رنگ های مختلف
- مقاومت های 220Ω
- سیم های جامپر
- جعبه کارت اختیاری است
- آردوینو uno
- منبع تغذیه (آداپتور لپ تاپ یا 5 ولت)
تمام ابزارهای ذکر شده نیاز اساسی برای کار پروژه هستند.
مرحله 2: اتصال نقطه ها
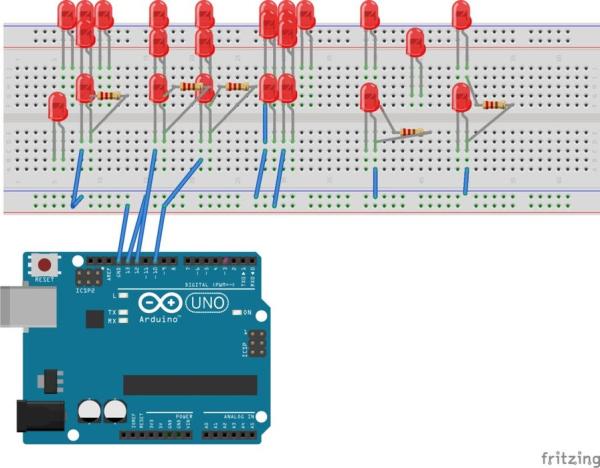
- در این مرحله باید چراغ های LED را به برد متصل کنید. من خود را به شکل حروف وصل می کنم.
- سپس مقاومت های 220Ω را همانطور که در تصویر بالا نشان داده شده است وصل کنید.
- اتصال سیم های جامپر به برد. این اتصال بین آردوینو به برد نان را فراهم می کند.
- یکی از سیم های جامپر را به GND (منفی) و یکی از سیم های مثبت مانند آن در نمودار را وصل کنید.
نمودار بالا نحوه اتصال کابل ها و ابزارها را نشان می دهد. اگر مبهم هستید بپرسید!!!!!!
مرحله 3: کد منبع
در این بخش از مرحله، کاربر باید کد منبع را وارد کند تا بیلبورد کوچک کار کند. من منبع مورد نیاز برای این پروژه را آورده ام. این کد خود توضیحی است.
بیشتر بخوانید: Mini Billboard
در ادامه، متن انگلیسی این مطلب را میتوانید مشاهده نمایید:
Designing a Mini BillBoard using LED Lights(different colors) , Arduino and Bread Board. Thought of creating a mini billboard, that could display my name (“Josh”) . This is for one of the build nights (required us to use LED lights). This billboard would blink in out josh several times just like any big billboard. Here is a link to the video of the project Mini BillBoard . Follow me on twitter @SJTGs
Step 1: Tools Needed for This Project
Tools needed for this project :
- Two Bread Boards
- LED lights with different Colors
- 220Ω Resistors
- Jumper Wires
- Card Box optional
- Arduino uno
- Power source (Laptop or 5v adapter)
All the mentioned tools are basic need for the project to work.
Step 2: Connecting the Dots
- This step will require you to connect the LED lights to the board. I connect mine in form of letters.
- Next connect the 220Ω Resistors as shown in the above image.
- Connecting the jumper wires to the board. This will provide connection between the Arduino to the bread board.
- Connect one of the jumper wires to the GND (negative) and the one of the positive like that in the diagram
The above diagram shows how the cables and tools need to be connected. If you are unclear ask!!!!!!!
Step 3: the Source Code
This part of the step will require the user to input in the source code to make the the mini billboard work. I have include the source needed for this project. This code is self explanatory.
Read more: Mini BillBoard
