

خروجی دادهها میتواند بسیار مفید باشد، و معمولاً وقتی به انجام این کار نگاه میکنیم، یا به ترمینال سریال آردوینو یا به نوعی نمایشگر مربوط میشود. اما در مورد ایجاد کپی فیزیکی از داده ها چه می شود؟ بنابراین چند ماه پیش، SparkFun شروع به فروش یک چاپگر حرارتی کرد که میتوانید آن را به یک میکروکنترلر ( یا از طریق adafruit ) وصل کنید. همان روز مغزم پر شد از کارهای دیوانهواری که میتوانستید با آن انجام دهید، مثل یک کلوچه ثروت بزرگ که میتوانست ثروت شما را در پرواز چاپ کند.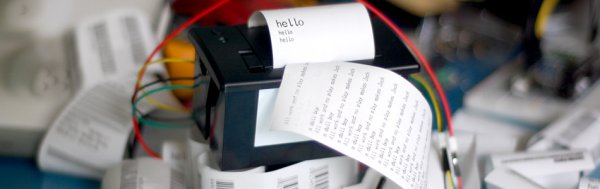
به هر حال... اگر در مورد پرینترهای حرارتی اطلاعاتی ندارید، اغلب چاپگرهایی هستند که رسید فروشگاه شما روی آنها چاپ می شود. دلیل این امر این است که آنها از جوهر استفاده نمی کنند یا از هر نوع کارتریج استفاده می کنند. کاغذی که روی آن چاپ می کند وقتی گرم می شود سیاه می شود. بنابراین این چاپگر به سادگی حرارت را در جایی که چاپگر دیگری جوهر اعمال می کند اعمال می کند. در نهایت هد چاپگر فرسوده می شود، اما این پس از چندین مایل چاپ. بله، مایل - حدود 30 نفر از آنها. بنابراین با توجه به اینکه رول های کاغذ 34 فوت طول دارند، شما می توانید حدود 4600 رول را قبل از مرگ هد چاپ کنید، به این معنی که برای اکثر ما، هرگز چنین اتفاقی را نخواهید دید.
وصل کردن آن
بنابراین این چاپگر را می توان با 5 ولت خاموش کرد، اما نه پین 5 ولت در آردوینو، و نه از طریق USB. در حالت نشسته انرژی بسیار کمی مصرف می کند، اما هنگام چاپ تقریباً یک آمپر کامل مصرف می کند! و از آنجایی که بیشترین مقدار USB که می تواند تحمل کند نیمی از آن است، ما به یک منبع تغذیه خارجی نیاز داریم. چیزی بین 5 تا 9 ولت و حداقل خروجی 1400 میلی متر (بزرگتر خوب است). من متوجه شدم که با تغذیه چاپگر با 9 ولت، آن را بسیار سریعتر و کمی تیره تر از 5 ولت چاپ می کند، و اگر آن را در دسترس دارید، توصیه می کنم از 9 ولت استفاده کنید.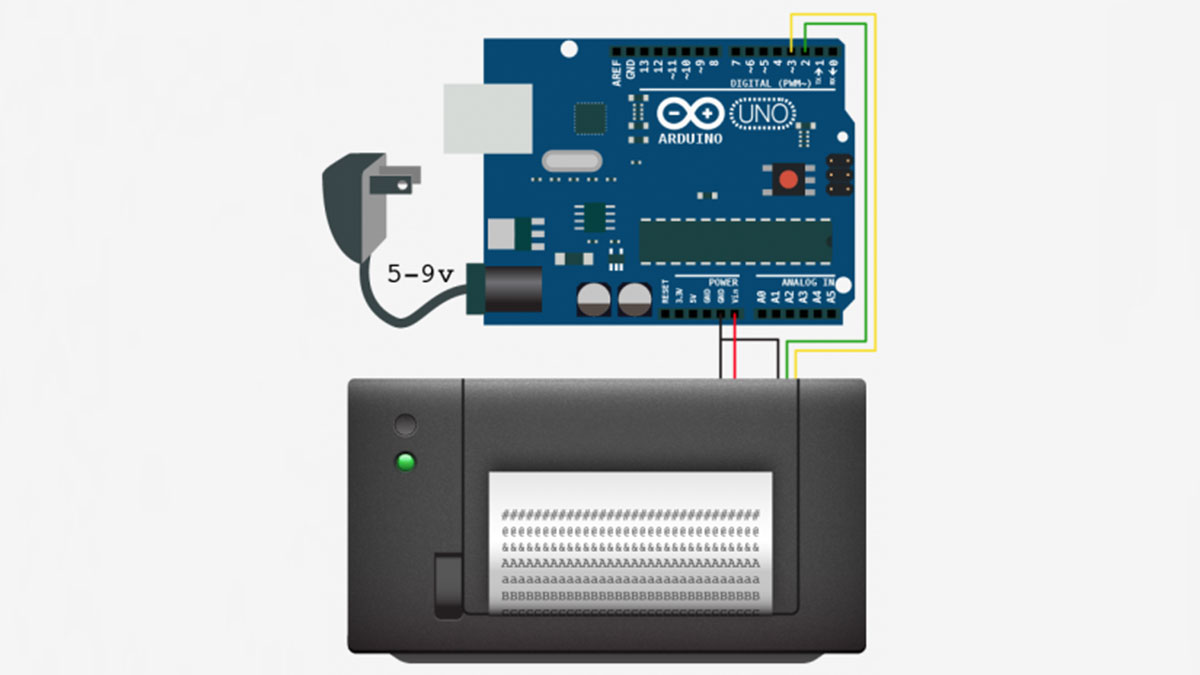
همانطور که در تصاویر نشان داده شده است، دو راه برای اتصال منبع تغذیه وجود دارد. میتوانید آردوینو و چاپگر را جداگانه روشن کنید، یا میتوانید آردوینو را روشن کنید و چاپگر را از آردوینو خاموش کنید.
برای جزئیات بیشتر: نمایش روی کاغذ - پرینتر حرارتی + آردوینو
در ادامه، متن انگلیسی این مطلب را میتوانید مشاهده نمایید:
Outputting data can be extremely useful, and typically when we look at doing this, it is either to the Arduino’s serial terminal, or to some sort of display. But what about making physical copies of the data? So a few months back, SparkFun started selling a thermal printer that you could connect to a microcontroller (or via adafruit ). That same day my brain filled with crazy thing you could do with it, like a giant fortune cookie that could print your fortune on the fly.
Anyways… If you dont know about thermal printers, they are most often the printers your store’s receipts are printed on. The reason for this is that they dont use ink, or use a cartridge of any sort. The paper it prints on turns black when heated. So this printer simply applies heat where another printer would apply ink. Eventually the printers head will wear out, but this after several miles of printing. Yes, miles – about 30 of them. So given that the rolls of paper are 34ft long, you can print about 4,600 rolls before the print head dies, meaning for most of us, you will never see that happen.
Hooking it up
So this printer can be powered off of 5V, but NOT the 5v pin on your arduino, and no via USB. It uses very little power when it is is just sitting by, but uses around a full amp when it is printing! And because the most USB can handle is half of that, we need an external power supply. Something between 5 and 9V, and a minimum of 1400ma output (larger is fine). I found that powering the printer with 9v, it printed much faster, and slightly darker than 5v, and if you have it available, I recommend using 9v.
There are two ways of connecting the power supply as shown in the illustrations. You can either power your arduino and the printer separately, or you can power the arduino, and power the printer off of the arduino.
For more detail: Displaying on Paper – Thermal Printer + Arduino
